Tag : demolition

Cold Chisel, Warm Heart

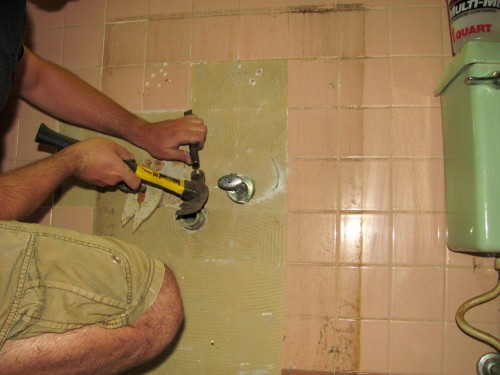
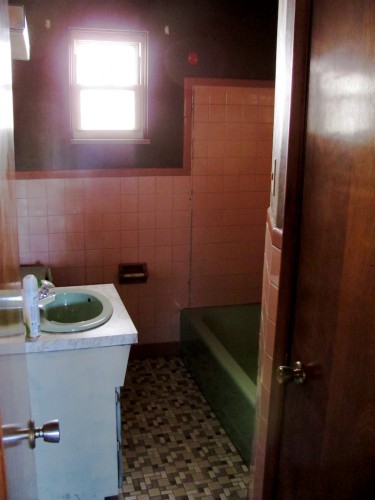
For some reason I knocked all the tiles off before I demolished the walls. It was sort of fun chiseling them off, but just unnecessary. I suppose I did it that way because all the write-ups I found online talked about knocking tiles off so that they could be reused. In my case, no, I will not be reusing my tile. Because it sucks.

In the beginning was the bathroom.

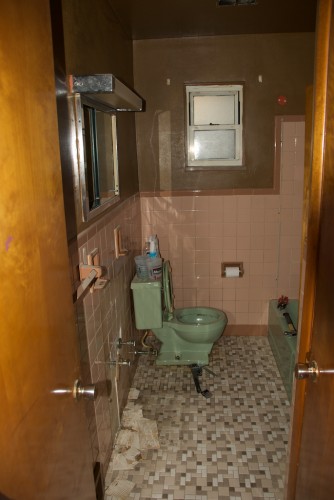
And then we pulled the vanity out of it. Yes, the tile is pink and the walls and ceiling are brown.

Was pink.

Happiness is a cold chisel.

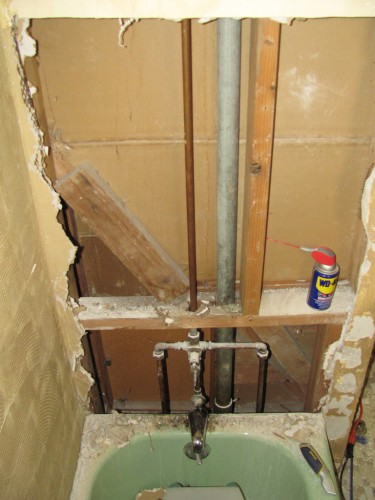
Then (after cutting them out with a drywall knife and hitting them with a hammer repeated) the walls came tumbling down.

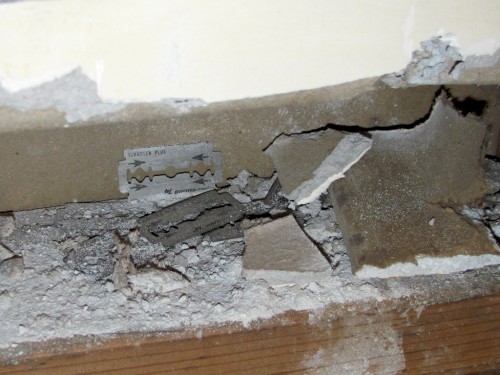
Stoked to discover 52-year-old razor blades inside the wall. Made of tungsten!

And now, instead of a hideous pink, green, and brown bathroom, I have a rubble-covered, wall-less, function-less room. ¡Viva el progreso!

For some reason also I thought I’d enjoy this renovation stuff during-the-fact. It’ll be a good thing to have done, but in the meantime I’m sick of having to live in the basement and dump my bank account into Home Depot’s.

Out,

bkd

Meanwhile, Back in the Kitchen

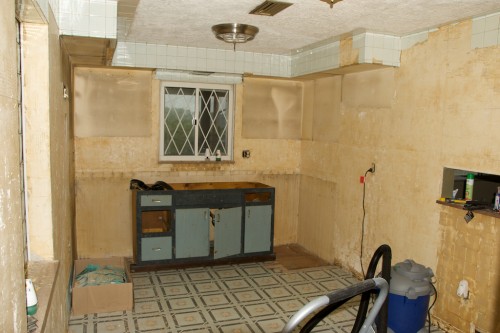
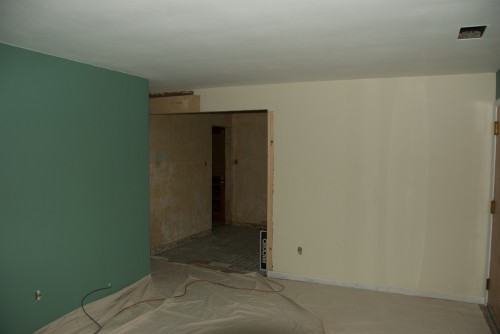
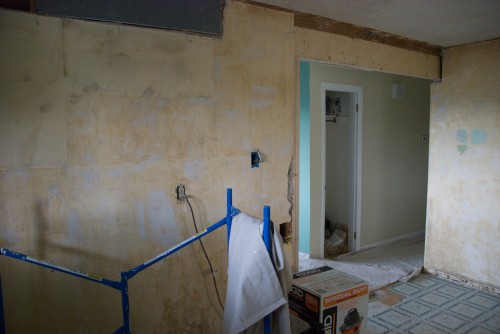
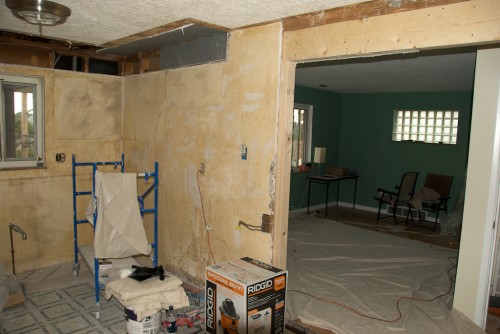
The kitchen has been opened up. The new gaping hole isn’t finished off at all yet, but still: the kitchen has been opened up. Makes a much bigger difference than the photos can convey — a lot more light gets in there and the kitchen now feels like it’s sort of part of the same space as the living room. At least the one part of the kitchen does. It’ll be interesting to see what it’s like when the kitchen is in use — the work areas of the kitchen will still be behind the wall and cut off. Should probably put a big mirror up against the one wall so I can see what the servants are doing in there while I’m in here playing Fallout: New Vegas.

Also took the “bulkhead” out of the kitchen (just a drywall box coming down from the ceiling and hanging down to meet the tops of the wall cabinets). That change is less dramatic, although imho it makes the room look bigger.

Used to be just a three-foot opening; now it’s maybe seven-and-a-half.

View of coat closet. Obviously.

Missing: bulkhead.

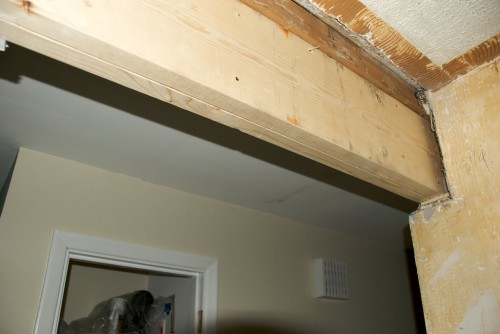
There had been much speculation in certain circles about what would happen with the beam going across the to-be-removed wall. See!

It’s just two 2x12s screwed together. Had to get into the hallway wall a little bit. And on the side of the opening not pictured are two 2x4s holding up the new beam.

And aside from writing the check, I’ve had nothing to do with this part of the project.

bkd

Plugger of Holes, Douser of Stains, Demolisher of Closets

Woke up late. Went to the Home Despot twice (twice!) to buy hoses for my new used dryer only to find out I got a gas leak in that system somewhere (should I shut the gas off? no, I’m sure it’s harmless). Don’t imagine that’s all that interesting. But filling nail holes with putty?

Spellbinding.

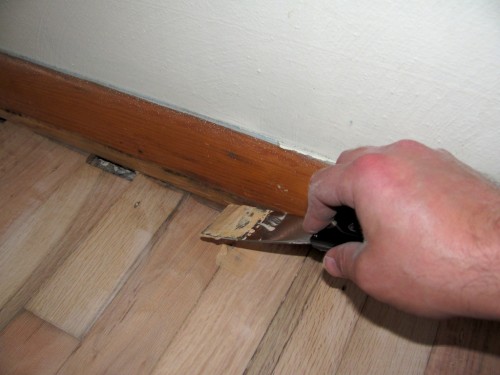
I’m also pursuing the sisyphusian, er, pursuit of filling all the edges of the floor (the part that runs up against the baseboards) so that I can leave the toe plate off. Unfortunately, this floor was laid down with the then-firm knowledge that there’d be another round of molding added to the system, so they just left gaps (you can see one in the photo above). We’ll see how it works out. They should sell wood putty in bigger tubs — I’ve been through two already and will probably need at least a couple more tomorrow.

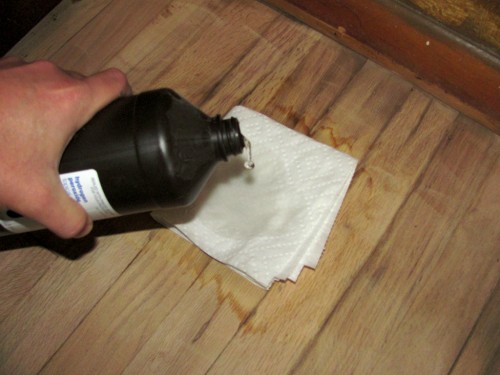
And then, since it seems like I’m probably going to leave the floor natural (and not stain it), I’m trying to get rid of the last holdout of a urine stain in the house. I guess hydrogen peroxide is supposed to be good for that, but that it can take many days. Hrm.

Today is day two.

Fortunately, the peroxide in this bottle is topical.

I want to get these floors done. I’m tired of living in the basement like a common troll. I might pronounce this stain “light enough” pretty soon. It’s getting a little lighter. It’s about 3″ x 3″ and it’s behind the door in the big bedroom, so it’s not something that you’d likely see very often. Yeah, I dunno. We’ll see how it goes.

As for the closet — all the bedroom closets are standard 1958 in arrangement. They have a shelf with a hanger rod underneath. They’re all in decent shape, but I need more clothes storage space, so I gotta do something better in the big bedroom closet. Here are before and after the removal of hardware:

The main difference is the addition of the stepladder.

It was in there pretty good and 52-year-old nails don’t necessarily like getting pulled. You can also see “Brian’s Bane” in there — that gray stuff coming down from the ceiling on the back wall of the closet. Pretty sure that’s from water damage from some time in the (distant?) past (the plaster has peeled off the old-school “drywall”). The back wall I can just mud over, but the ceiling is pretty screwed up all the way through to the insulation. I’m thinking I might have a guy put (modern) drywall up there or something.

Bought one of those Rubbermaid closet organizers off of Amazon for it. I bought the deluxe organizer instead of the standard one. Couldn’t for the life of me tell what the difference was, aside from the deluxe one being $10 cheaper for some reason. But if I have to wait for a new ceiling, it’ll probably be a while before it gets installed (and I’ll probably move upstairs into the #2 bedroom instead of the “big” one).

I should probably get myself to back off a little, but I’m really stoked on this idea of moving upstairs soon. I’m sort of hoping over the upcoming weekend. That’s probably aggressive, but all I have to do is: plug more holes in the floor tomorrow (where the shoe molding used to go), sand the corners and the putty fill, three coats of urethane, paint the baseboards, paint the ceilings, and paint the walls.

Yeah. Maybe the following weekend.

bkd

Of the Chisel and Gritted Tooth

I’m thinking of titling my blog posts like titles of Jack London novel chapters.

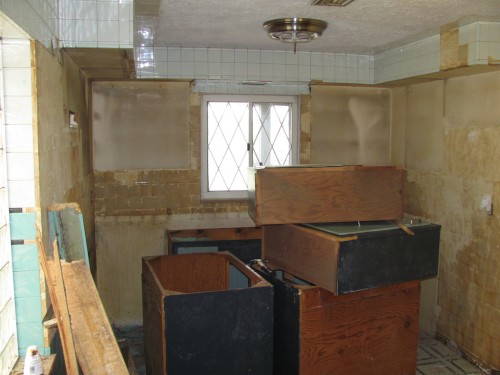
Goal for today was to get the kitchen to a point where I could put it away for a few days while I work on getting the wood floors re-finished. Didn’t get as much done as I was hoping, but it’s kind of hard to estimate how long it’s going to take you to do things that you’ve never done before. OTOH, I *did* get to chisel a lot of glue off of walls.
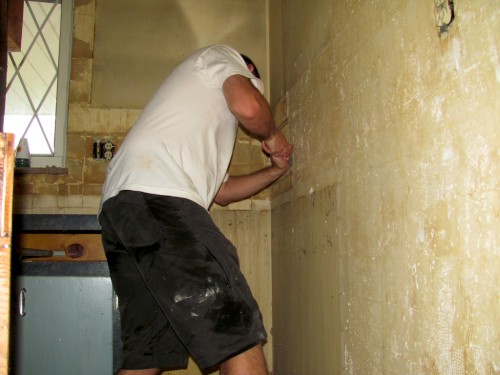
Chiseling makes me sweat through my shorts.

I’ve spent so much time here lately chiseling glue off of my kitchen walls that, last night when I closed my eyes to fall asleep, all I could see was a chisel clearing a white-yellow path through stripes of putty-colored tile glue, strips of adhesive flying off to either side. Occasionally my vision would morph into a chisel attacking low-profile stripes of glue stragglers, chipping away once, twice, before brown flakes flew from the wall. I’m serious, that really happened.

Of course, the tragedy of spending an entire day chipping through 52-year-old glue is that, well, you can take all the pictures of it that you want, no one can really tell that you’ve done anything.

Also in preparation for not doing anything in the kitchen for a few days (in retrospect, I’m not sure why I needed to “prepare” for this), I also moved the old cabinetry and counter-top down into the garage, where it will wait until trash gets picked up on Thursday. This was a dramatic moment in the counter-top movement:

It was the moment I used tin snips to cut through the metal band that still held the counter-top together, even though I’d already smashed through the wood in order to get it off the top of the cabinets in the first place. I mean, that’s *the moment*, you can see the blur around the metal thing and stuff.

And the side of the counter-tops facing you? That’s the actual top of the counter. That’s why I was in a hurry to get this crap out of my house. I mean, you know, “hurry”.

Here are before and current photos of the kitchen then.
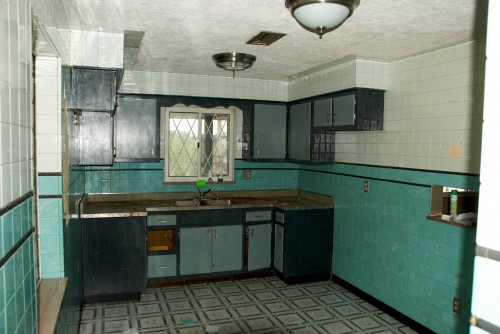
kitchen from 1958Before.

Now.

Tools and equipment used in the kitchen so far:

  • 2-inch chisel.
  • 3-inch putty knife.
  • Heat gun.
  • Shop-vac (vacuuming a pile of dried glue makes kind of a cool sound).
  • Hammer.
  • Pipe wrench.
  • Crescent wrench.
  • Tin snips.
  • WD-40.
  • Screwdriver.
  • Pry bar.
  • Goggles.
  • Head lamp.

But mostly the chisel.

Depending on whether something else distracts me, the plan today is to head out to Wilkins Twp to pick up the drum sander and then, you know, start sanding. Although I sort of need to get a washer and dryer really soon, so if Craigslist is willing, that might cut into my sanding time. Plus Red Dead Redemption is supposed to be getting delivered today.

It’s a day rich with possibilities.

Obviously,

bkd
The Kitchen Must Die!

The cat urine smells bad, but it doesn’t trip me out to think about it. The crap that got left on the kitchen counter, though, that kind of trips me out. I don’t think I took a picture of it though as such.

Kitchen Before:

kitchen from 19581958: Alive and well as of a couple days ago.

Kitchen Now:

1958: Mostly dead.

Of course mostly dead means slightly alive, etc., etc.

The one cabinet where the sink used to be is still attached to the wall. I’m probably just going to obliterate it in order to get it out of there — the pipes, you see. The pipes go through it, you see. So, you see, you can’t just pull it off. I’m guessing there’s some magical, easy way to get it off of there, if only I knew the secret, but fwiw I’ll probably kind of enjoy hacking into it with my hammer and pry bar.

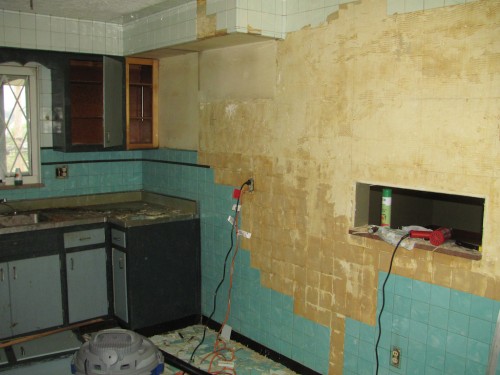
Taking the tiles off the wall has been great. I didn’t get all that done today, btw. And I’m not done. The tiles are no problem, truthfully. The glue that holds them on? Sucks.

I’m really trying to show off the tile glue, but check out that pass through — so convenient: the cook can pass stuff into the living room without anyone having to see what she looks like.

For some reason the person who did the tiles on the lower 4 1/2 feet of the wall used a ton of glue. Whoever did the top half was considerably more considerate. You can kind of see that in the photo (top half clean, bottom half problematic). Someone online suggested a heat guy as a simple way to get the stuff to just fall right off the wall. I’m starting to realize that people who post to online forums aren’t always right. Realize again, I mean. Just like someone else on some other forum said to never try to take wall cupboards down by yourself. I did it by myself and I’m really not that big a deal. Apparently it’s possible.

Also read that:

  • You should never rock the cupboards back and forth to get them off the wall (I did, it worked).
  • You should take all the doors off the cupboards before taking them down (I didn’t, it worked).
  • You should turn the power off to the kitchen before removing cabinetry (that doesn’t even make sense).

Hadn’t ever had to detach a sink before. It turns out that, when it’s the right thing and you use it, WD-40 seems to do magic.

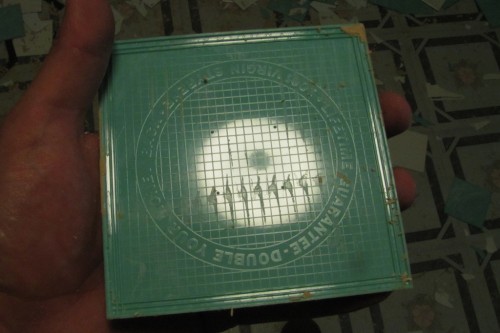
Back to the tiles for those of you still, like, reading. They were plastic. There, that was it.

Well also: I’m using mostly a 2-inch chisel on the tiles and glue. The stuff about the heat gun — the glue definitely doesn’t just fall off under the heat, at least not *my* glue. But it does sort of soften it and it might result in fewer divots in the plaster. I’m still kind of luke warm on the heat gun (har!). We’ll see what tomorrow brings.

Not sure which of these three statements is the weirdest.

And does the double-money-back guarantee apply to tiles accidentally removed by ramming a 2-inch chisel into their sides? And I’m pretty sure the “100% Virgin Styrene” is the weirdest of the three. They were on these walls for 52 years — that’s a pretty good duty cycle for a square piece of plastic. Well done, guys, well done.

bkd